> For the complete documentation index, see [llms.txt](https://easify.gitbook.io/easify-box-bundle-builder-docs/llms.txt). Markdown versions of documentation pages are available by appending `.md` to page URLs; this page is available as [Markdown](https://easify.gitbook.io/easify-box-bundle-builder-docs/user-guide/visual-editor/create-a-new-box.md).
# Create a New Box
After installing and activating the **Easify Box Builder** app on your active theme, you’re ready to create your first custom box (or bundle). This guide will walk you through the setup process step by step.
{% stepper %}
{% step %}
### Step 1: Set Your Box Name & Type
#### **A. During App Onboarding**
Right after installing the app, you’ll be guided through the onboarding process. At the end of this flow, you’ll create your first box.
To get started:
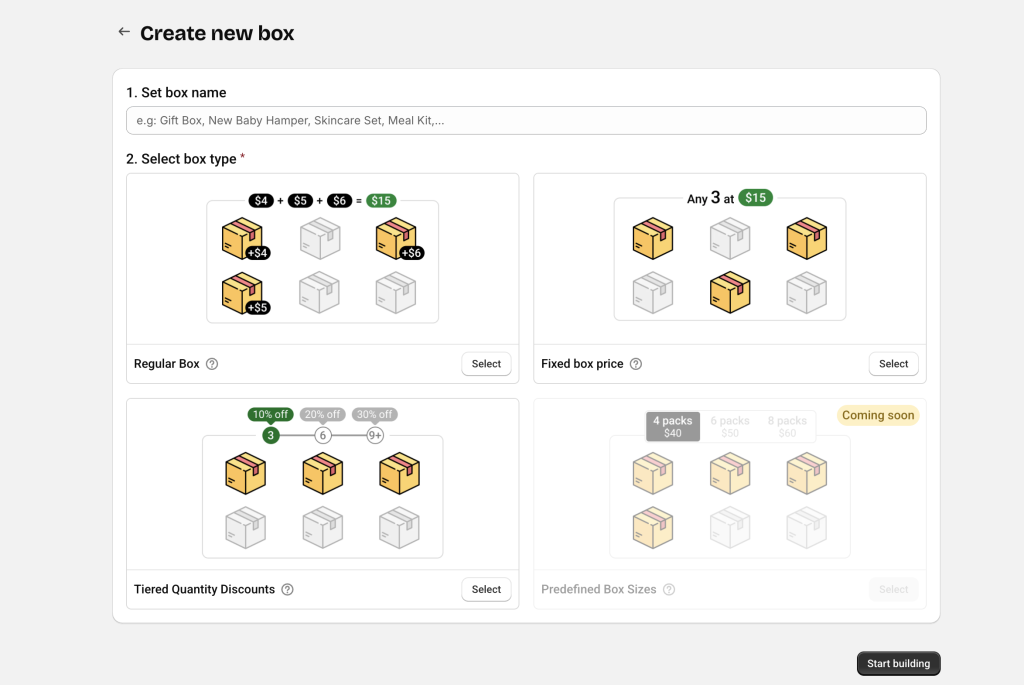
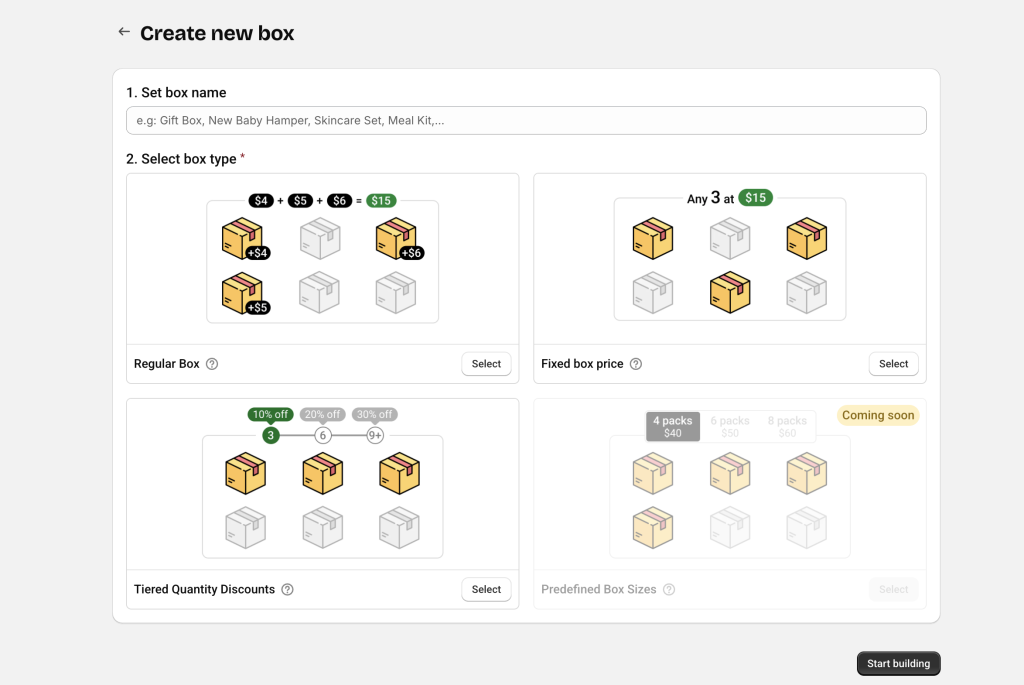
1. **Enter your Box name** (e.g., *Build A Box*). Don’t worry, you can edit this later if needed.
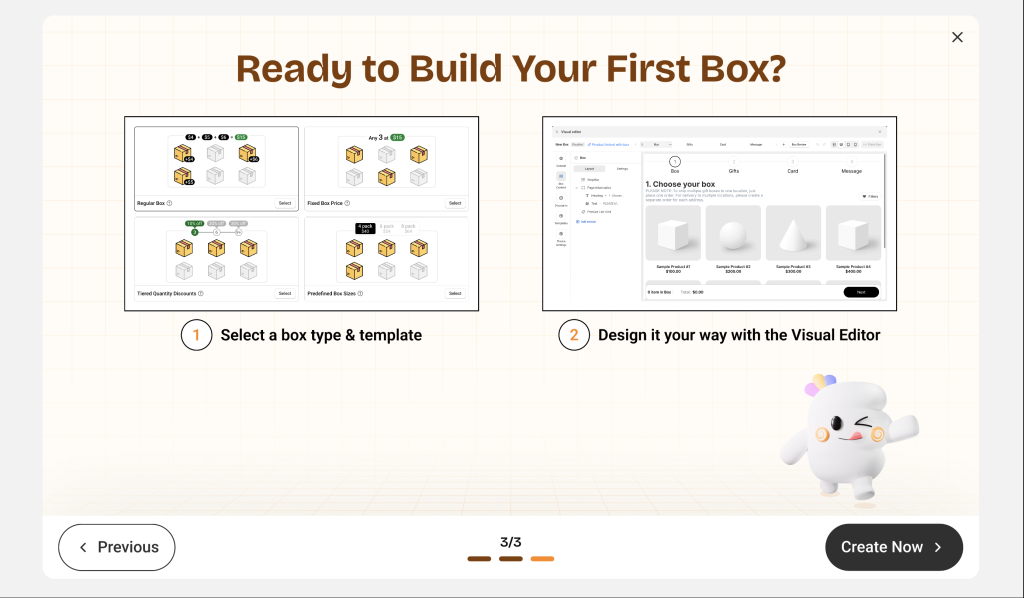
2. **Choose the Box type.** Easify Box Builder offers various types to match different selling strategies:
* ***Regular Box:*** Price equals the total of selected items. You can optionally apply discounts.
* ***Fixed Box Price:*** Customers buy exactly *X* items at a fixed box price of *Y*.
* ***Tiered Quantity Discounts:*** The more items customers add, the bigger the discount (e.g., buy 3 get 10% off, buy 5 get 20% off).
* ***Predefined Box Sizes**:* Fixed price per quantity tier (e.g., 4 for $40, 6 for $50, etc.).
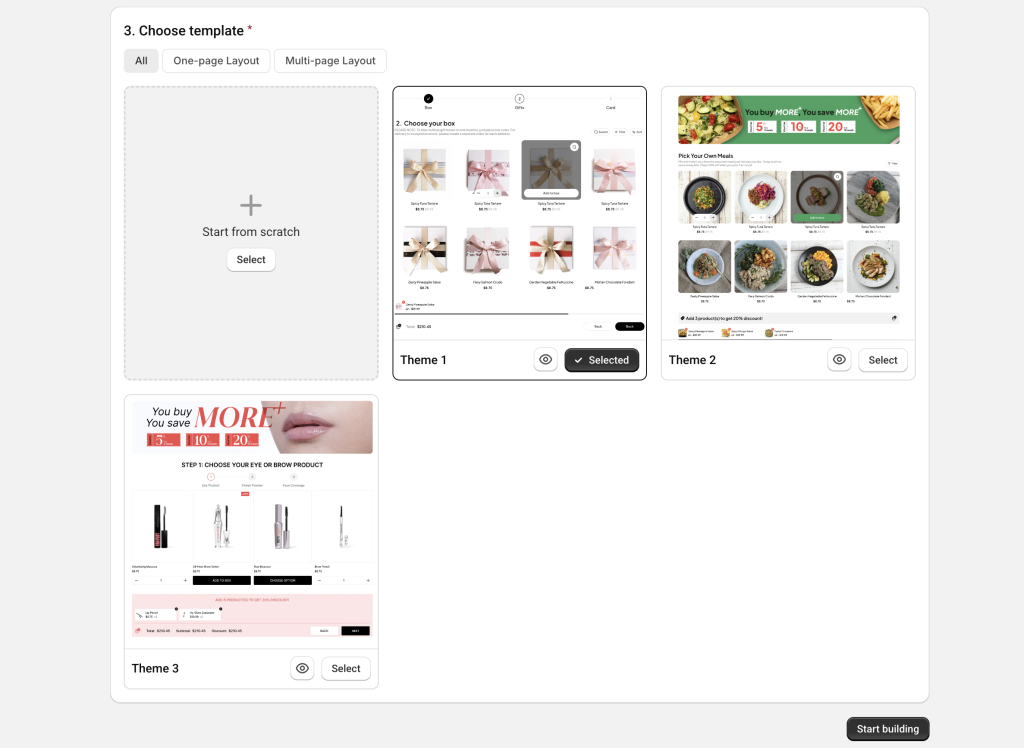
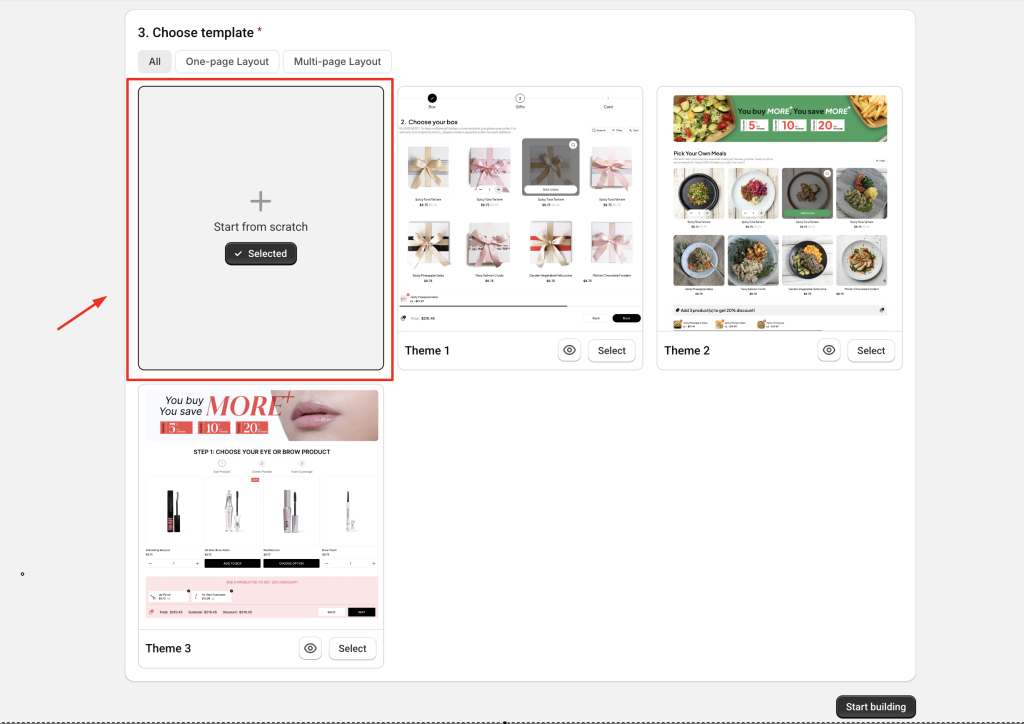
Once you’ve selected a box type, you’ll see a set of ready-to-use templates designed for that type. You can choose:
* **Start with a template** – Recommended for faster setup (fully customizable later), or
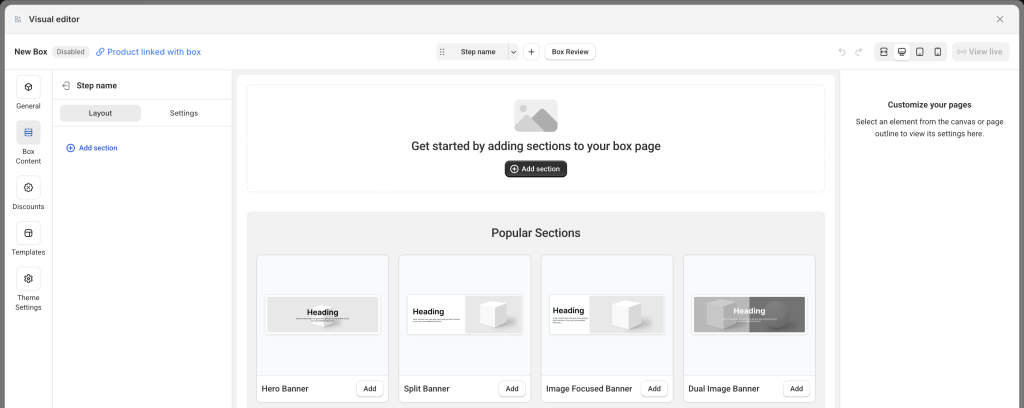
* **Start from scratch** – Build everything from the ground up.
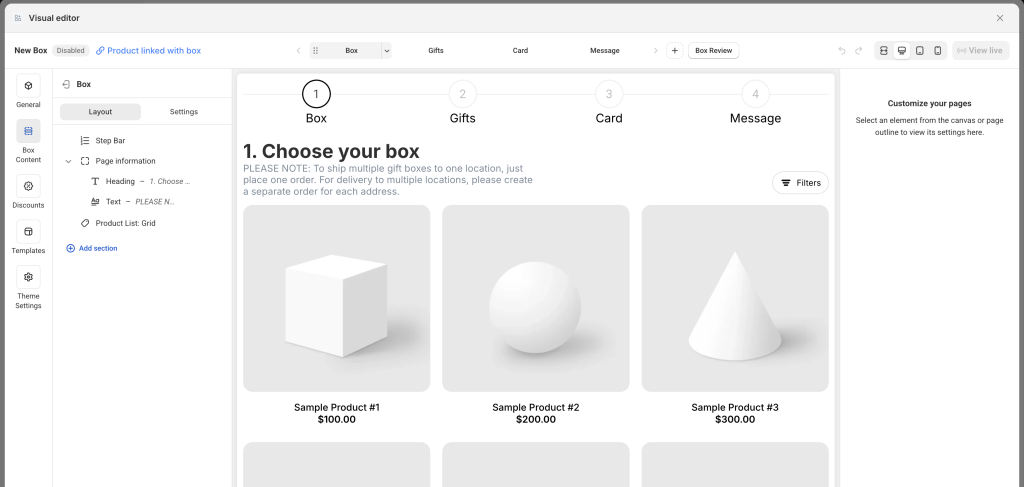
After choosing your option, you’ll be taken to the **Visual Editor** to design your box content and layout—the real fun begins!
#### **B. Creating More Boxes Later**
Once you’ve created your first box through onboarding, you can easily create more boxes anytime.
Here’s how:
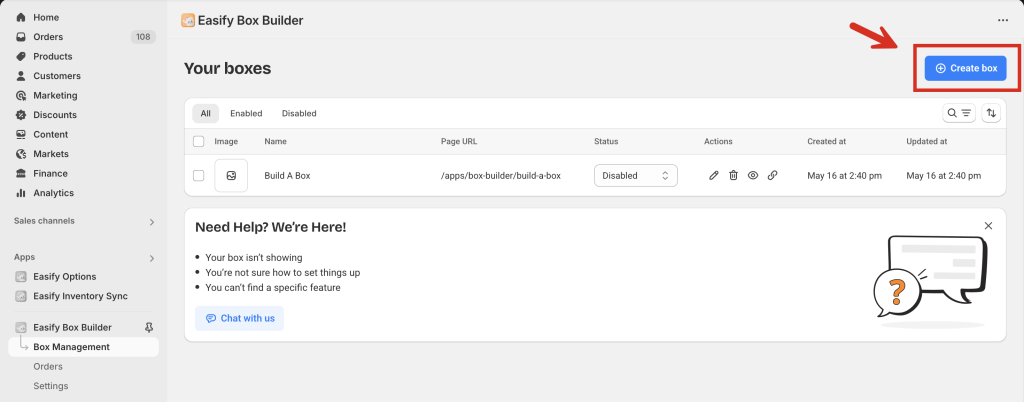
* In the app’s left-hand menu, go to the **Box Management** tab.
* Click the **Create box**.
* Choose your box type and template (or start from scratch), then move to the Visual Editor—just like the first time.
{% endstep %}
{% step %}
### Step 2: Build Your Box with the Visual Editor
If you’ve used Shopify’s Theme Editor or a page builder before, the **Easify Visual Editor** will feel familiar. If not, don’t worry!\
Watch the quick tour video below to explore the basics before getting started.
You can also check out our [**Key Terms**](/easify-box-bundle-builder-docs/user-guide/getting-started/key-terms.md) guide to understand the most common terms used in the Visual Editor.
#### **A. Build with a Template**
When you start with a template, it includes a layout and demo content to get you going. From there, you can freely customize everything:
* **Steps:** Edit step names, add/remove steps, reorder them, or rename them.
* **Page title & description:** Each template includes demo headings and text. You can edit or replace them with your own, using Heading/Text elements or a Banner section.
* **Products:** Add products to each step’s product list section.
* **Custom fields:** Edit, remove, or add fields as needed.
* **Discounts:** Templates may include pre-set discounts to help you understand how it works. If not, you can add your own from scratch based on your selected box type.
* **Theme Settings:** Customize everything from layout, step bar, product cards, quick view, quick summary, summary page, typography, loading icon, add-to-box behavior, and even custom code.
> For a step-by-step example of creating a box with a template, [**check this guide**](/easify-box-bundle-builder-docs/user-guide/visual-editor/create-a-new-box/create-a-new-box-with-a-template.md).
{% hint style="info" %}
**Reminder:** Templates don’t limit your creativity—they’re just a faster starting point. You can still fully customize the layout, content, and styling. Even developers will find using templates saves time compared to building from scratch.
{% endhint %}
#### **B. Build from Scratch (No Template)**
Didn’t find a template that fits your needs? No problem, you can create your own unique box from a blank canvas.
> [**Check this guide**](/easify-box-bundle-builder-docs/user-guide/visual-editor/create-a-new-box/create-a-box-from-scratch-without-a-template.md) for a complete walkthrough on building a box page from scratch.
{% endstep %}
{% step %}
### Step 3: Publish Your Box
New boxes are set to **Disabled** by default, and the **View live** button is inactive until enabled.
When your box setup is complete:
1. Open the **General** tab in the left-hand navigation.
2. Change the status to **Enabled**.
3. Click **Save**.
Now, the **View live** button will become active—click it to preview your box page on your storefront.
{% endstep %}
{% endstepper %}
## Need Help?
Questions? Stuck somewhere?
We’re always here to help! Just reach out via our **in-app live chat** for 24/7 support.