> For the complete documentation index, see [llms.txt](https://easify.gitbook.io/easify-box-bundle-builder-docs/llms.txt). Markdown versions of documentation pages are available by appending `.md` to page URLs; this page is available as [Markdown](https://easify.gitbook.io/easify-box-bundle-builder-docs/user-guide/help-and-support/faqs-most-common-questions.md).
# FAQs – Most Common Questions
Why isn’t my box showing on the storefront?
There are two things to check:
* **Box Status** – Make sure your box is **Enabled**.
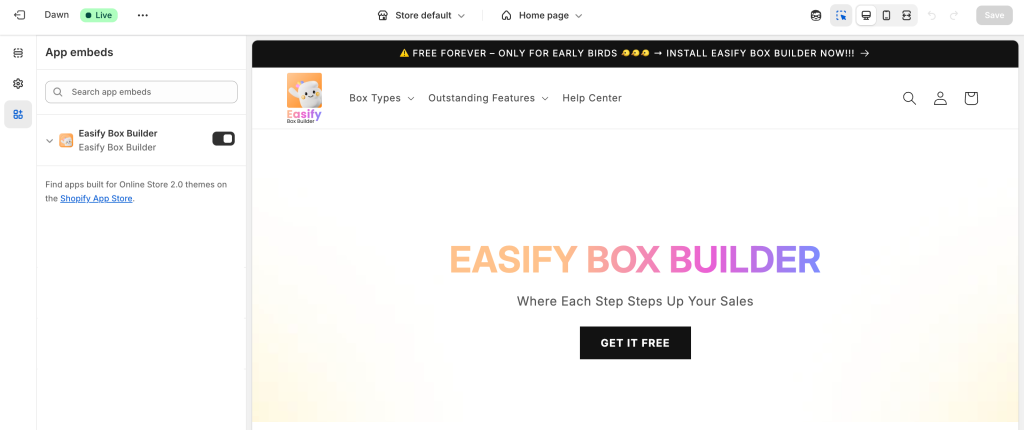
* **App Activation Status** – Check that the app is activated on your **live theme**. If it’s only enabled on a test theme, the box won’t appear on your storefront.
Why do I see the notification “You can’t add more than 0 item(s)”?
* This happens when using a Fixed Price box type with Quantity set to 0. Go to Discount & Subscriptions tab in the visual editor and change Quantity to 1 or higher.
* Or when any rule (Box Rule, Step Rule, Product Grid Rule, or any Required Selection setting) is set to 0. Please review all rules and make sure none of them is set to 0.
Why is the price showing $0 or incorrect at checkout?
**Common causes:**
* A product inside the box is set to $0. For Fixed Price boxes, the total product price must be higher than the fixed price.
* The linked product has not enabled **Track Inventory** in Shopify Admin.
* Conflict with a third‑party checkout app (Cart Transform API).
* The linked product was deleted or edited incorrectly.
**How to fix it:**
1. Make sure every product in the box has a price higher than $0 (or use a dummy price that's higher than your fixed box price).
2. Go to **Shopify Admin → Linked Product** and enable **Track Inventory**.
3. If you're using a third‑party checkout app, change **Box Item Display** to **"Show items separately"**.
4. If the linked product was accidentally deleted, regenerate it.
Can I limit how many items customers can select per step?
Yes! Each step has a **Required Selections** section where you can set conditions like:
* “is equal to”
* “is greater than or equal to”
* “is less than or equal to”
This helps guide customers to select exactly how many products you want them to.
Can I customize the box page design to match my store?
We’re working on a **Visual Editor** that will allow full design control – colors, layout, and elements – just like using Shopify’s theme editor or a page builder.
If you can’t wait, feel free to chat with our support team! We can help apply custom CSS to match your store style until the editor is released.
How do I redirect customers to the cart instead of the checkout page?
By default, customers go straight to checkout after reviewing their box. To change this:
1. Go to **Settings** in the app.
2. Find the **Redirect after box review** section.
3. Choose either **Go to cart page** or **Open cart drawer**.
How do I let customers enter gift messages or notes?
Use the **Custom Fields** feature. In any step, expand the **Custom Fields** section and add a text input like a **Text Area** for gift messages. You can control character limits and more. \[See guide]
Can I hide or disable out-of-stock products?
Yes! By default, out-of-stock products/variants are hidden. But if you’d rather show them in a **disabled** state (unclickable), just:
1. Go to **Settings**.
2. Scroll to **Out-of-Stock Product Display**.
3. Choose your preferred setting.
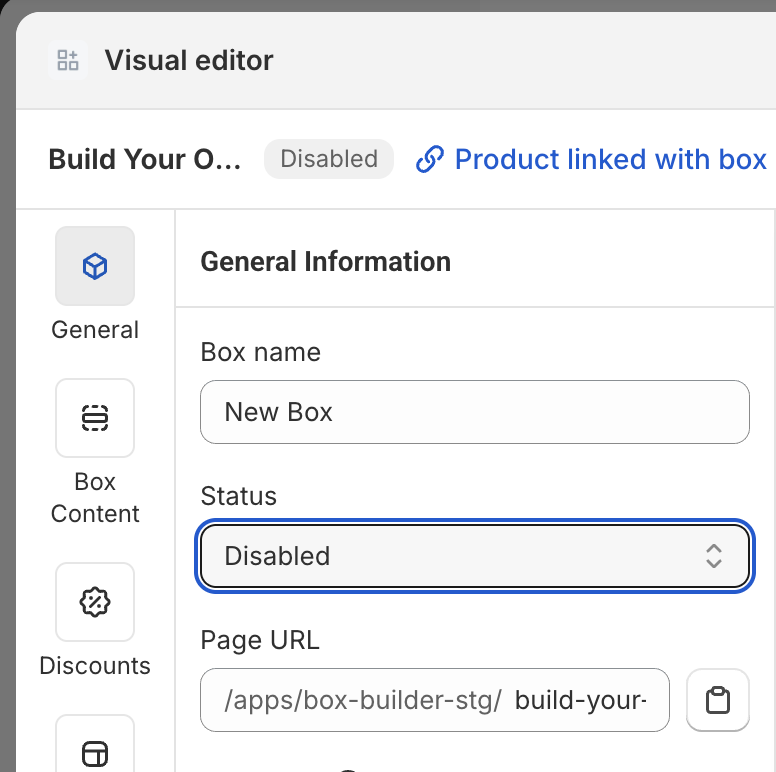
How do I change the page URL (handle) of my box?
The app automatically generates a handle based on your box name, but you can change it:
1. Go to your box’s **General** page.
2. Find the **Page URL** field.
3. Enter a new, unique handle.
Does the app support multiple languages?
Yes! You can:
* Translate app default texts.
* Translate your custom box content.
Does the app support multiple currencies?
Yes! When a customer switches your store’s currency, product prices on the box builder page update automatically to match.
How can I add selected items individually, without grouping them under a box product?
By default, items are grouped under one product using **Cart Transform**. To show them separately:
1. Go to **Settings**.
2. Find the **Box Item Display** section.
3. Change to **Show items separately**.
How do I sort the order of products shown in a step?
While manual reordering isn’t supported yet, here’s a workaround:
* Create a new Shopify **Collection** with the products in your preferred order.
* Add that collection to your box step.
* The product order from the collection will apply in your box.
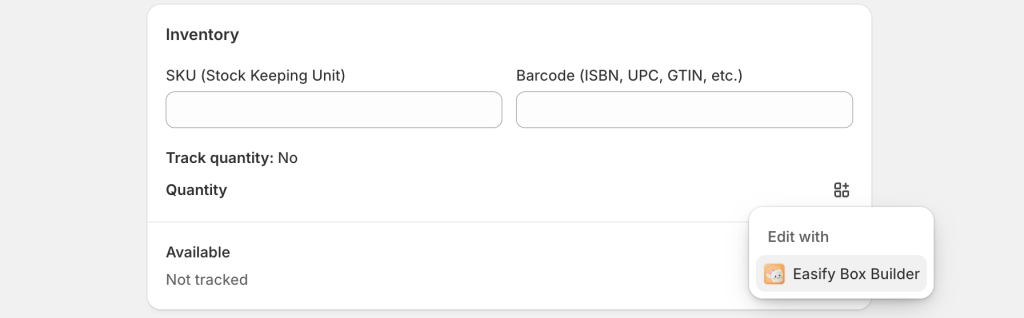
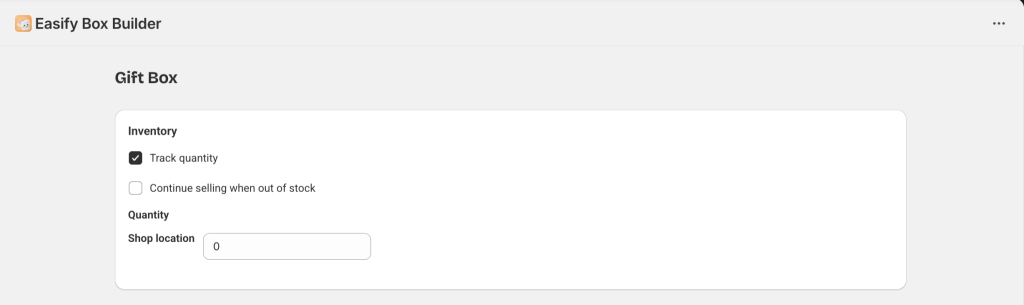
How do I set or track quantity for products linked to the box?
Products linked to a box aren’t tracked by default. To manage quantity:
* Go to the product settings **within the Easify Box Builder app** and update the quantity manually.
Can I show custom field info (like gift notes) in emails or packing slips?
By default, custom fields aren’t shown in emails or packing slips. You can manually add them by updating your templates. [\[Follow this guide for help.\]](/easify-box-bundle-builder-docs/user-guide/more-features/show-custom-options-on-new-order-notification-emails-to-staff.md)
Can I set up discount rules for my boxes?
Yes! In the visual editor, please go to Discount & Subscription tab and start editing your discount rules.
Can I pre-select products in a step without customer action?
This feature is currently under development and will be available soon!
Can I set up subscription plans for boxes?
Yes! In the visual editor, please go to Discount & Subscription tab. Click the Get plans button to load plans from your subscription app(s).
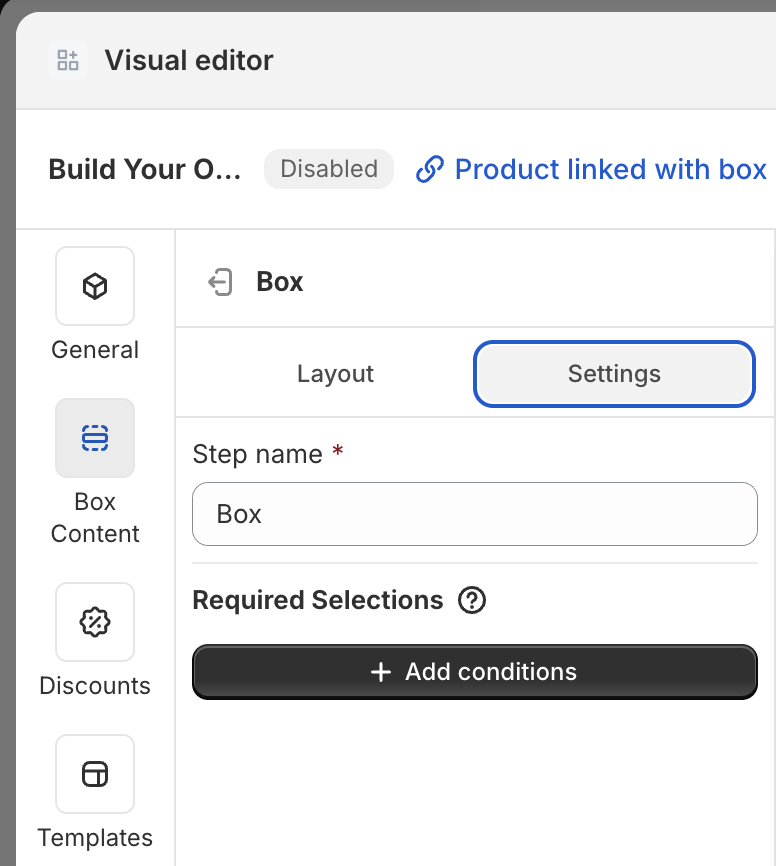
How to set the required selection logic for different steps?
You can set Required Selections for the box, step pages, or product list. To set it for a step, open the visual editor, go to Box Content > Settings tab of the step > Required Selections, then click Add conditions.
How to set the required selection logic for the product list?
In the visual editor, go to Box Content > add or edit a Product List section > Required Selections, then click Add conditions.
How to set the required selection logic for the whole box?
From the visual editor, go to General > Required Selections, then click Add conditions.
How to enable the quantity selector for products?
Go to Theme Settings > Add to Box Button Behavior in the visual editor. Select Quantity selector for both “Products without variants” and “Products with multiple variants.”
Should the product linked with box be Active, Draft, or Unlisted if I’m not ready to publish the box on store yet?
By default, the product linked with box status is Unlisted – the box will remain hidden from storefront search and search engines regardless.
How do I change the ‘Add to Cart’ button on the product page to a ‘Build a Box’ button?
In Product Admin, change the box product status from Unlisted to Active. Then in Shopify Admin, open the Theme Editor, go to the product page, add a block, and select the Easify Box Builder Button app block.
How to link or show a box on a regular product page?
Change the box product status to Active in Product Admin. Then in Shopify Admin, Theme Editor, add the Easify Box Builder Button app block to the product page.
How to show the box on a collection page?
Add the box product to the collection in Product Admin. Then in Shopify Admin, Theme Editor, go to the collection page and add the Easify Box Builder Button app block.
Which Shopify theme works best with Easify Box Builder?
It works with all Online Store 2.0 themes, but performs best with Dawn. If you face issues, contact support via live chat.
Can I charge extra for certain custom options/ fields?
In the visual editor, go to Box Context > add or edit a Custom Field > Add option values, then add a price or select an add-on product to charge it.
How do I remove the “Create new box” button from the Box Review page?
Contact support via live chat — we’ll customize it for you free of charge.
Can I select many subscription plans in a box?
Only one subscription plan can be selected per box. That plan can include multiple selling plans.
Can I delete the ‘Easify Box Builder’ tag from my orders?
No — the tag is required for proper order tracking and analytics.
How do I move the “Add to box” button below the product image?
In the visual editor, go to Templates and choose one where the button is below the product image (e.g., Bedding Set, Candle Trio, Nail Polish Set, Makeup Set). In Choose apply method, select Partially update, tick all available Style (S), and confirm.
Let us know if you have more questions – we’re here to help via in-app chat anytime!
\
— Easify Team
---
# Agent Instructions
This documentation is published with GitBook. GitBook is the documentation platform designed so that both humans and AI agents can read, navigate, and reason over technical content effectively. Learn more at gitbook.com.
## Querying This Documentation
If you need additional information that is not directly available in this page, you can query the documentation dynamically by asking a question.
Perform an HTTP GET request on the current page URL with the `ask` query parameter:
```
GET https://easify.gitbook.io/easify-box-bundle-builder-docs/user-guide/help-and-support/faqs-most-common-questions.md?ask=
```
The question should be specific, self-contained, and written in natural language.
The response will contain a direct answer to the question and relevant excerpts and sources from the documentation.
Use this mechanism when the answer is not explicitly present in the current page, you need clarification or additional context, or you want to retrieve related documentation sections.