> For the complete documentation index, see [llms.txt](https://easify.gitbook.io/easify-box-bundle-builder-docs/llms.txt). Markdown versions of documentation pages are available by appending `.md` to page URLs; this page is available as [Markdown](https://easify.gitbook.io/easify-box-bundle-builder-docs/sales-lab/first-sale-cheat-sheet/use-popups-to-promote-your-box.md).
# Use Popups to Promote Your Box
You’ve built your box. You’ve added it to your homepage, collection page, and navigation menu. But how do you make sure customers actually notice it?
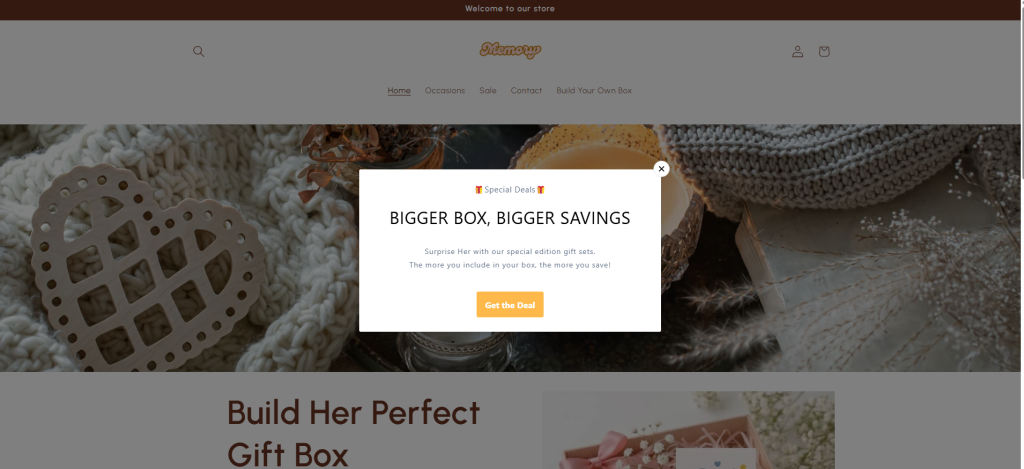
Sometimes you need to be a little more direct. A popup is exactly that – a small window that appears when someone lands on your store, grabbing their attention right away.
**Why this helps you get that first order**
A popup puts your box front and center the moment a customer arrives. No scrolling, no searching, no clicking through menus. Just a clear message: “Hey, check out this special box.” One click on that popup, and they’re inside your box builder, ready to create something unique. That’s the shortest path to a first order.
For this guide, we’ll use [**Pop Convert ‑ Pop Ups, Banners**](https://apps.shopify.com/pop-convert) – it has a free plan and works well for this purpose.
## Step-by-Step Setup
{% stepper %}
{% step %}
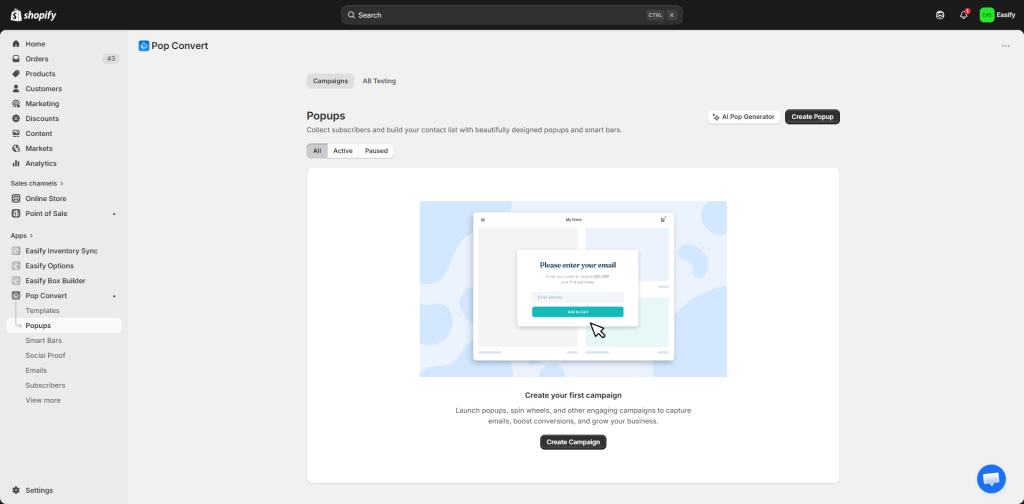
### Step 1: Install Pop Convert
Go to the Shopify App Store, search for “Pop Convert ‑ Pop Ups, Banners,” and click Install. Once installed, open the app from your Shopify admin, click Create campaign then Create Popup.
{% endstep %}
{% step %}
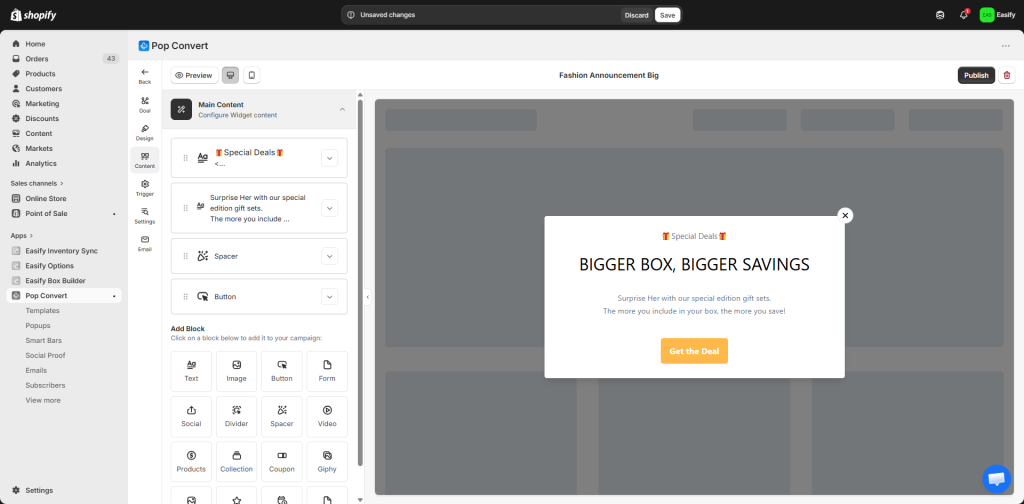
### Step 2: Design – Make it look right
Choose a template or start blank. Use the drag-and-drop editor to adjust colors, size, and layout. Keep it clean and easy to read.
{% endstep %}
{% step %}
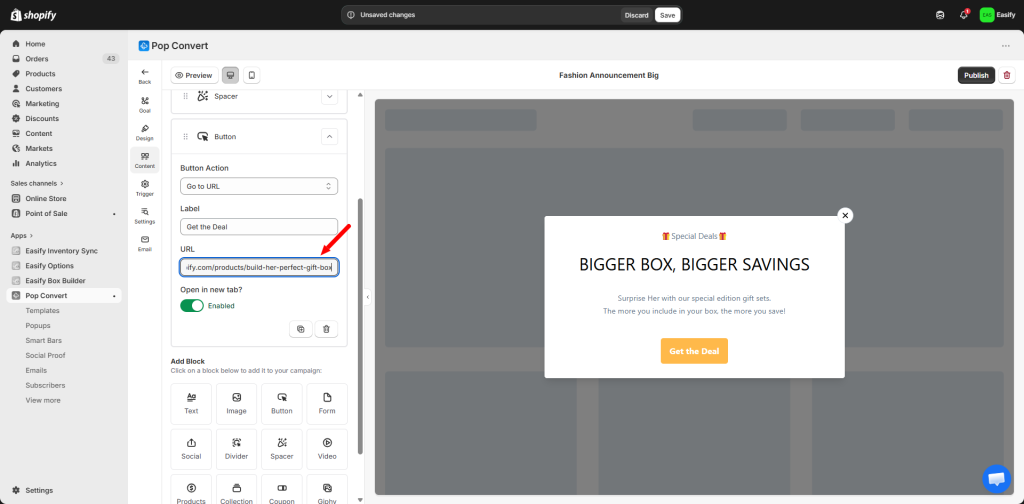
### Step 3: Content – Write what matters
Click on any text to change it. Write a short, punchy message about your box
Then click on the button element and paste the URL of your box product page into the link field. When customers click, they go straight to your box builder.
{% endstep %}
{% step %}
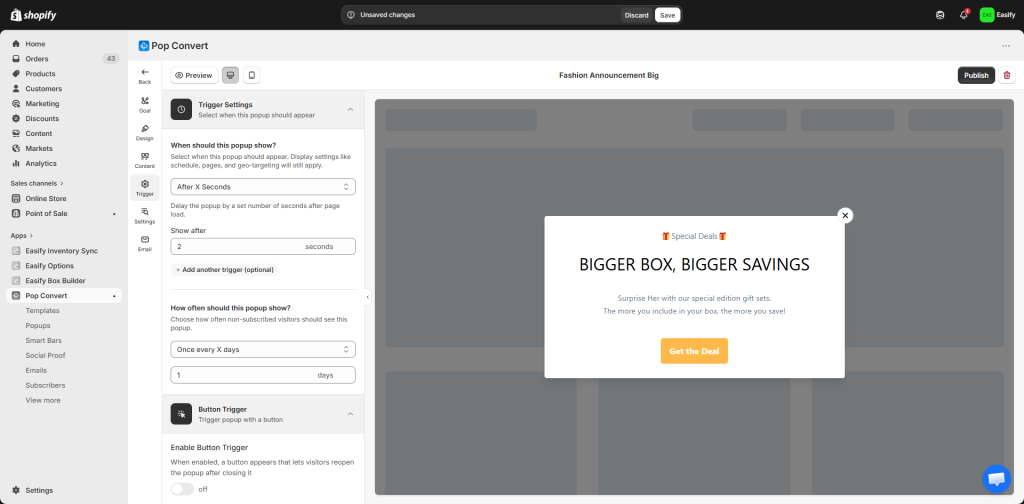
### Step 4: Trigger – When should it appear?
Go to the Triggers section. Set the popup to appear after a delay – 2 to 5 seconds is usually best. Long enough for customers to settle in, short enough that they don’t miss it.
{% endstep %}
{% step %}
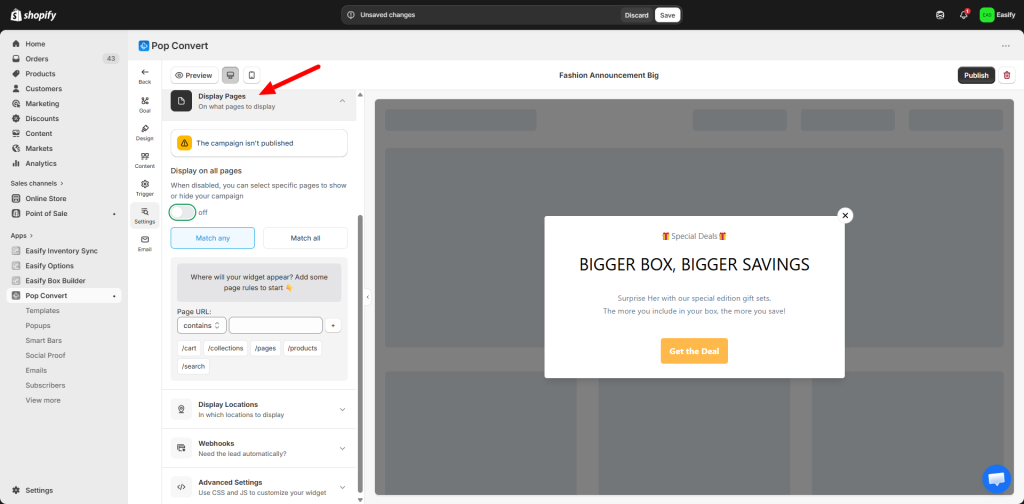
### Step 5: Visibility Setting – Where should it show?
Control where the popup appears. For example, show it only on the homepage, or only to new visitors. You can also set it to appear once per session so returning customers aren’t annoyed.
{% endstep %}
{% step %}
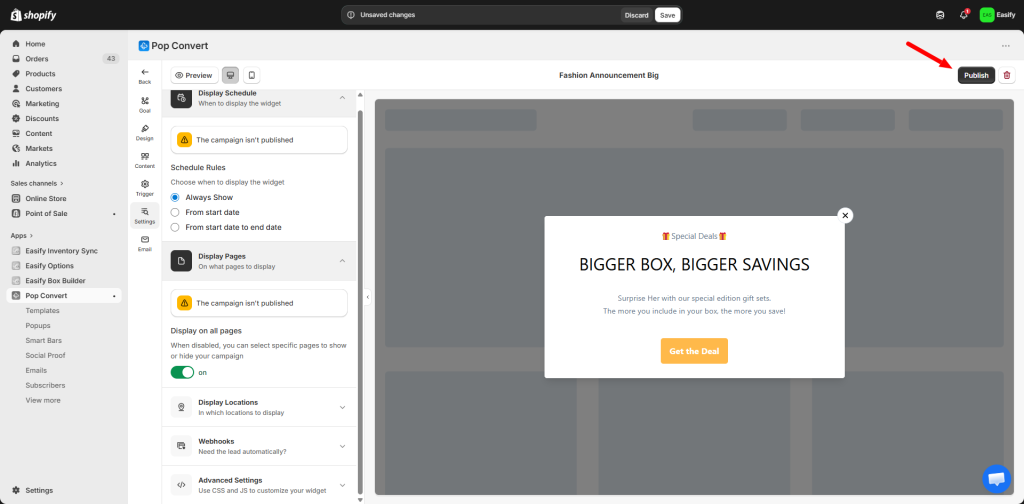
### Step 6: Save and Publish
Click Save and Publish. Visit your store in a window to test. The popup should appear after the delay you set. Click the button to confirm it takes you directly to your box builder.
{% endstep %}
{% endstepper %}
### Need assistance?
If you run into any issues or have questions while following this guide, feel free to reach out. You can contact us through the Easify in-app live chat, or reach out to Pop Convert’s support team directly. We’re both here to help!
---
# Agent Instructions
This documentation is published with GitBook. GitBook is the documentation platform designed so that both humans and AI agents can read, navigate, and reason over technical content effectively. Learn more at gitbook.com.
## Querying This Documentation
If you need additional information that is not directly available in this page, you can query the documentation dynamically by asking a question.
Perform an HTTP GET request on the current page URL with the `ask` query parameter:
```
GET https://easify.gitbook.io/easify-box-bundle-builder-docs/sales-lab/first-sale-cheat-sheet/use-popups-to-promote-your-box.md?ask=
```
The question should be specific, self-contained, and written in natural language.
The response will contain a direct answer to the question and relevant excerpts and sources from the documentation.
Use this mechanism when the answer is not explicitly present in the current page, you need clarification or additional context, or you want to retrieve related documentation sections.
 **Why this helps you get that first order**
A popup puts your box front and center the moment a customer arrives. No scrolling, no searching, no clicking through menus. Just a clear message: “Hey, check out this special box.” One click on that popup, and they’re inside your box builder, ready to create something unique. That’s the shortest path to a first order.
For this guide, we’ll use [**Pop Convert ‑ Pop Ups, Banners**](https://apps.shopify.com/pop-convert) – it has a free plan and works well for this purpose.
## Step-by-Step Setup
{% stepper %}
{% step %}
### Step 1: Install Pop Convert
Go to the Shopify App Store, search for “Pop Convert ‑ Pop Ups, Banners,” and click Install. Once installed, open the app from your Shopify admin, click Create campaign then Create Popup.
**Why this helps you get that first order**
A popup puts your box front and center the moment a customer arrives. No scrolling, no searching, no clicking through menus. Just a clear message: “Hey, check out this special box.” One click on that popup, and they’re inside your box builder, ready to create something unique. That’s the shortest path to a first order.
For this guide, we’ll use [**Pop Convert ‑ Pop Ups, Banners**](https://apps.shopify.com/pop-convert) – it has a free plan and works well for this purpose.
## Step-by-Step Setup
{% stepper %}
{% step %}
### Step 1: Install Pop Convert
Go to the Shopify App Store, search for “Pop Convert ‑ Pop Ups, Banners,” and click Install. Once installed, open the app from your Shopify admin, click Create campaign then Create Popup.