> For the complete documentation index, see [llms.txt](https://easify.gitbook.io/easify-box-bundle-builder-docs/llms.txt). Markdown versions of documentation pages are available by appending `.md` to page URLs; this page is available as [Markdown](https://easify.gitbook.io/easify-box-bundle-builder-docs/sales-lab/first-sale-cheat-sheet/add-your-box-to-your-navigation-menu.md).
# Add Your Box to Your Navigation Menu
Adding your box directly to your main navigation menu makes it incredibly easy for customers to find what you want to sell most. Instead of making them hunt through collections, a dedicated menu link acts as a clear, friendly call-to-action.
Here’s a simple idea: add a **“Build Your Own Box”** tab right in your navigation pane. When clicked, it takes customers directly to your box product page — for example, a “Build Her Perfect Gift Box” — where they can start choosing products and customizing their gift right away.
👉🏻 **Why this matters for your first order**
Many first-time buyers are looking for something meaningful, not just anything. A dedicated **“Build Your Own Box”** tab removes guesswork. It tells them immediately: “Here’s where you can create something special.” That clarity leads to faster first orders. No hunting. No confusion. Just an easy path to their first purchase.
## Step-by-Step Setup
{% stepper %}
{% step %}
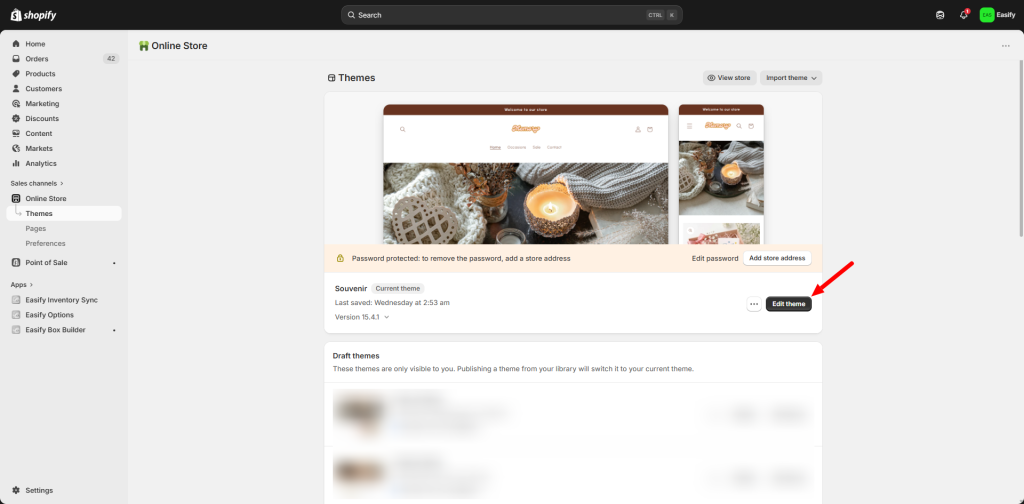
### Step 1: Access the Header Settings
Log in to your Shopify admin and go to Online Store > Themes. Click **Edit theme** next to your active theme.
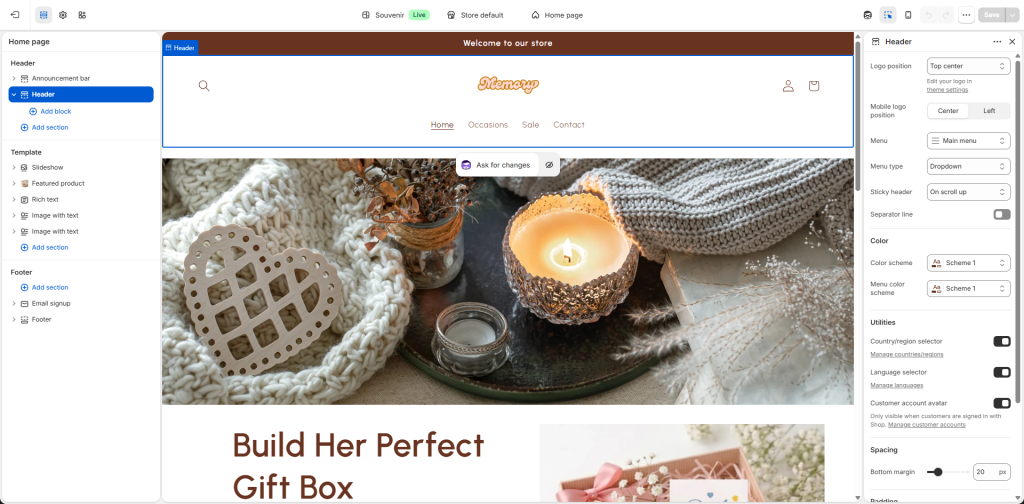
Once the editor opens, click on the **Header** section in the left-hand sidebar.
{% endstep %}
{% step %}
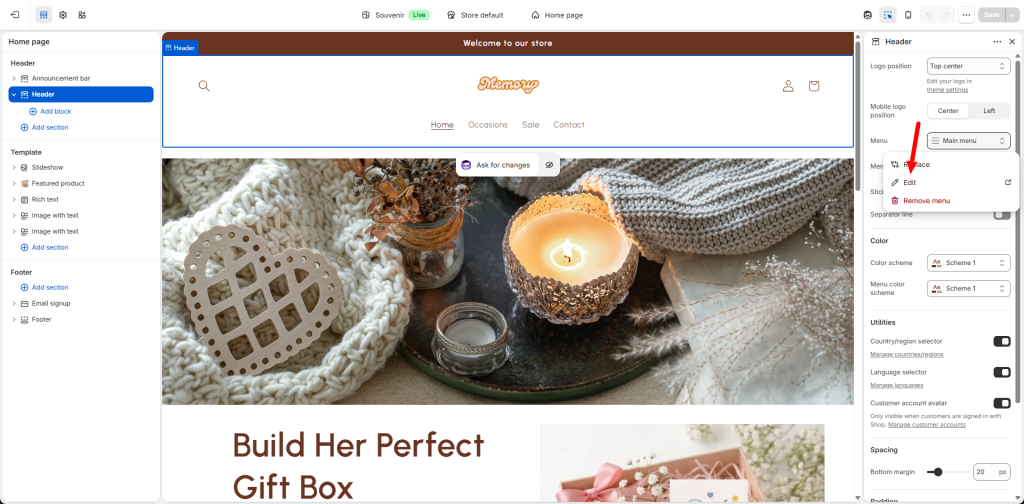
### Step 2: Select the Menu to Edit
In the Header settings, look for the **Menu** section. Click the **Edit menu** link. This will take you to the Navigation settings page where your menu structure is managed.
{% endstep %}
{% step %}
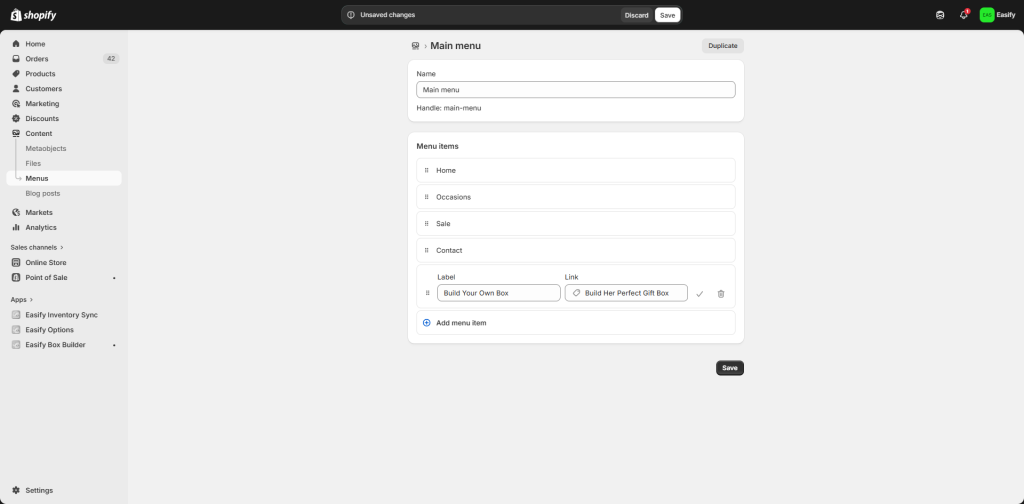
### Step 3: Add a New Menu Item
On the menu editing page, click **Add menu item**. A sidebar will appear for you to enter the details:
* **Name:** Enter the text you want to appear on the navigation bar, for example “Build a Box”
* **Link:** Click the box, select **Products**, then choose the specific product linked to your Easify Box Builder (for example, “Build Her Perfect Gift Box”)
{% endstep %}
{% step %}
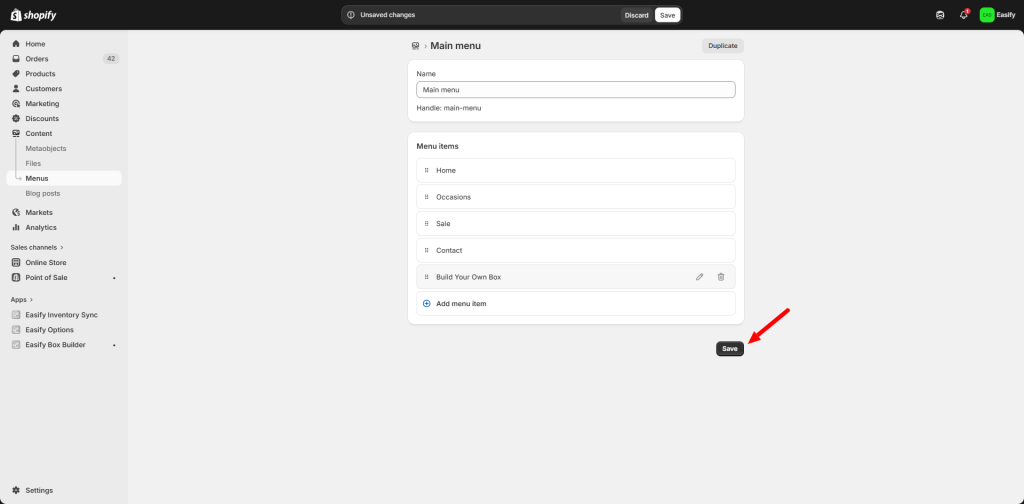
### Step 4: Save Your Changes
Once you have added the item, click the **Save menu** button at the top right or bottom right of the page to apply the changes to your store.
{% endstep %}
{% step %}
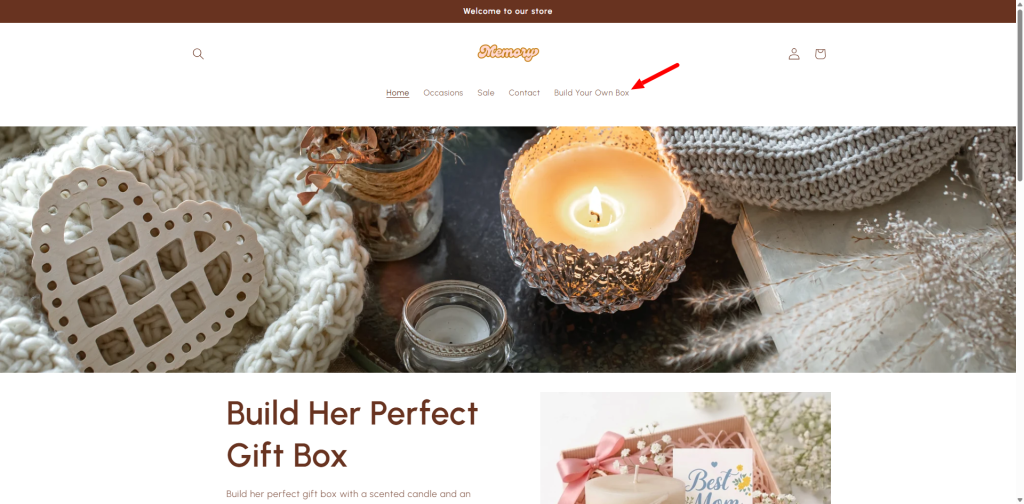
### Step 5: Review on Storefront
Go back to your live website and refresh the page. You should now see your new menu item prominently displayed on the navigation bar, leading customers directly to your box builder product.
{% endstep %}
{% endstepper %}
That’s one smart way to guide customers. But don’t stop there — let’s make sure your box also stands out when customers browse your collections. That’s exactly what we’ll cover in the next guide:[ ***“Highlight Your Box on Your Collection Page”***](broken://pages/r0atIIYHBFIMWuAJUCOX) — so your best-selling and customizable products stay visible at every step of the journey.
## Need assistance?
If you have any questions or encounter issues while following this guide, don’t hesitate to reach out through our in-app live chat. We’re always here to help you get that first order.
---
# Agent Instructions
This documentation is published with GitBook. GitBook is the documentation platform designed so that both humans and AI agents can read, navigate, and reason over technical content effectively. Learn more at gitbook.com.
## Querying This Documentation
If you need additional information that is not directly available in this page, you can query the documentation dynamically by asking a question.
Perform an HTTP GET request on the current page URL with the `ask` query parameter:
```
GET https://easify.gitbook.io/easify-box-bundle-builder-docs/sales-lab/first-sale-cheat-sheet/add-your-box-to-your-navigation-menu.md?ask=
```
The question should be specific, self-contained, and written in natural language.
The response will contain a direct answer to the question and relevant excerpts and sources from the documentation.
Use this mechanism when the answer is not explicitly present in the current page, you need clarification or additional context, or you want to retrieve related documentation sections.